Managing Reports
Using the vFire Core Report Designer, you can do any of the following:
- Create report types or templates
- Modify reports
- Rename existing reports
- Delete unwanted reports
- Export reports to applications outside vFire Core
Reports are organized into folders, by functional area. These folders are appropriate for the majority of Users, but should you wish to do so, you can also use the Report Designer to:
Creating a Report
vFire Core has a wide range of report types that you can generate. However, you may want to create an additional report that contains specific current or historical information, or can be run using a specific schedule. You can also create reports by importing existing ones from other applications.
Before you start
You must have Designer selected in your Reporting security role.
If you are importing a report, it must be saved on to your computer.
Any modifications made within the Report Designer will be organization wide.
-
Select Menu and then Reports.
From the submenu, select Report Designer. The Report Designer window is displayed.
The Explorer pane displays all the system-defined and in-house reports, within folders.
- From the Explorer pane, select the folder in which you wish the report to appear. The folder contents are displayed on the right side of the window.
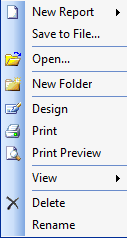
- Right click within the Contents pane, and from the pop-up menu, select New Report and choose from the available menu options:
- Once you have selected your required report, you will be able to give it a title.
- If you selected New Report or Load from File, an icon followed by the highlighted text “New vFire Core Report” or the name of the report you loaded is displayed in the folder. Replace the highlighted text with the name of the report that you want to create.
If you selected Based on Template or Copy from Existing Report, a window will display asking you to provide the report title. In the New Report Name dialog box, type in the name that you want to give to your report in the Report Name field and select OK. A report icon, followed by your new report will display in your designated folder. - In the Subject and Description fields at the bottom of the window, you may see information about the report, if it is based on an existing one. If there is no/incorrect information displayed, complete/update the details.
- Select
 in the bottom left hand corner of the window to save the details.
The Templates folder in the Report Designer window contains all report templates created by Analysts or provided out of the box with vFire Core. You can add reports to the Templates folder if necessary.
| Based on Template | Select this to create a report based on an existing report template within vFire Core. Highlighting this option will display another menu, listing all the available reporting templates that you can choose from. Select your required report template from this menu. All reporting templates displayed are those located in the Templates folder on the Report Designer window |
| Copy From Existing Report | Select this to create a report from one that currently exists in your system. Highlighting this option will display another menu, listing all the available reports in your system. Select your required report from this menu |
| Load from File | Select this to create a new report based on a vFire Core report file situated on your computer. Selecting this option will display a standard Windows open dialog box; locate the file you wish to load (report files have the extension RTM) and select Open |
| New Report | Select this to create a report from a default template |
Modifying a Report
Any modifications made within the Report Designer will be organization wide.
Before you start
You should have an understanding of relational database structures and a familiarity with report creation methodologies and terminology before attempting to alter existing templates or create custom ones.
You should also be familiar with running a report within vFire Core.
-
Select Menu and then Reports.
From the submenu, select Report Designer. The Report Designer window is displayed.
The Explorer pane displays all the system-defined and in-house reports, within folders.
- From the Explorer pane, select the folder in which your report is located. The entry is highlighted and the reports that are within this folder are displayed in the Contents pane.
- From the Contents pane, right click on the report you want to amend and from the pop-up menu, select Open
 .
. - The report is displayed with the Design tab uppermost.
 From here you can design the display and layout of the report, adding text, data fields and charting information. The window is divided into the following sections:
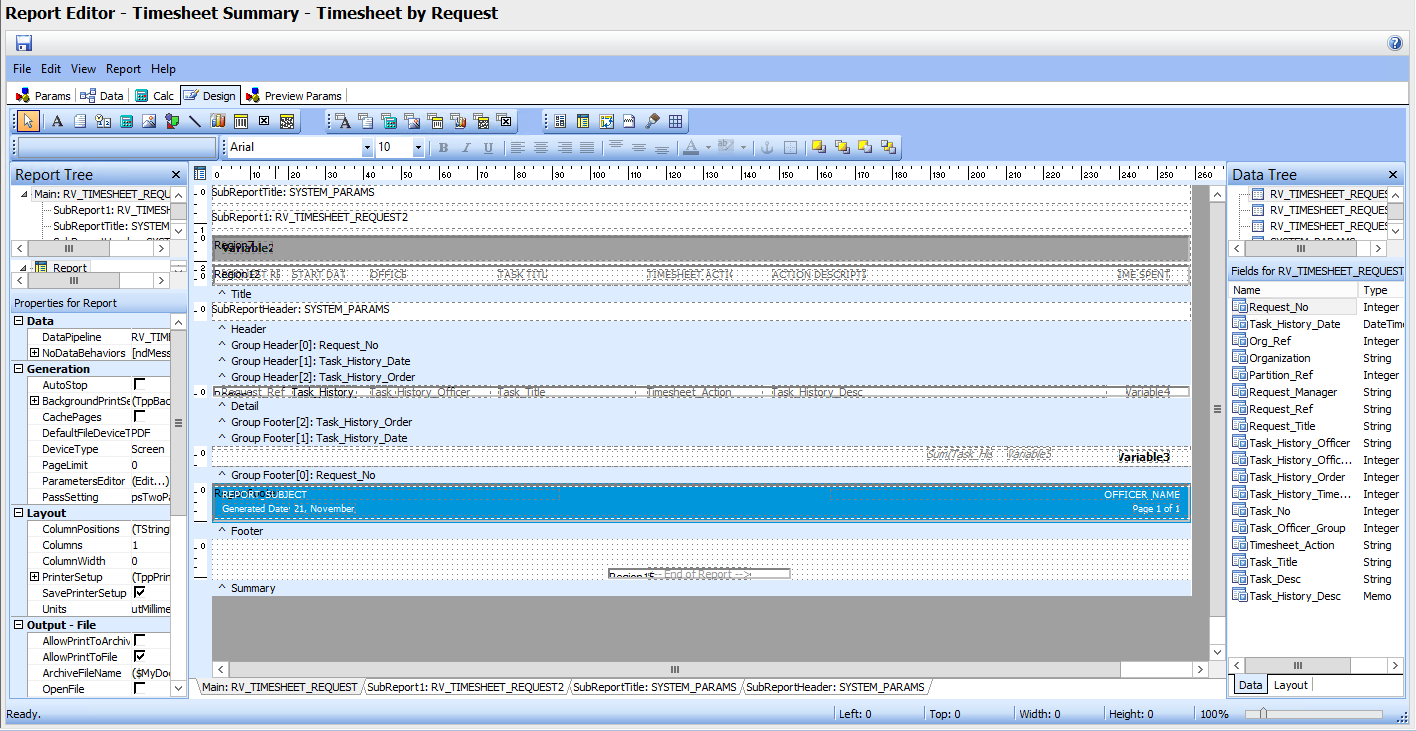
| Design toolbars and options | These are displayed across the top of the window and include quick access buttons for formatting text, aligning fields and adding charts. If you cannot see some toolbars, add them using the View menu in the Report Editor. Select View, then Toolbars and then select/deselect the item(s) you want to show/hide. |
| Report Tree | This is on the left of the window and lets you view and set the properties for the currently selected part of the report. This can be the currently selected field, reporting background, a chart added to the report, and so on. If you cannot see this, add it using the View menu in the Report Editor. Select View, then Toolbars and then select/deselect the item(s) you want to show/hide. |
| Report Layout | This takes up the main part of the window and is the actual area in which you can add text, fields and charts to suit your requirements. The information added to this section appears as it will in the final report. |
| Data Tree | This is displayed to the right of the window and lets you add fields to the report. You can add standard system parameters as well as the fields within the data views (as defined in the Data tab) defined for the report.If you cannot see this, add it using the View menu in the Report Editor. Select View, then Toolbars and then select/deselect the item(s) you want to show/hide. |
Report Designer is based on the ReportBuilder application by Digital Metaphors Corporation.
Renaming a Report
Any modifications made within the Report Designer will be organization wide.
-
Select Menu and then Reports.
From the submenu, select Report Designer. The Report Designer window is displayed.
The Explorer pane displays all the system-defined and in-house reports, within folders.
- From the Explorer pane, select the folder in which your report is located. The entry is highlighted and the reports that are within this folder are displayed in the Contents pane.
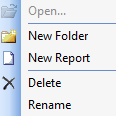
- From the Contents pane, right click on the report you want to rename and from the pop-up menu, select Rename .
- The name of the report is highlighted. Edit or replace the name of the report as necessary.
Deleting a Report
Any modifications made within the Report Designer will be organization wide.
-
Select Menu and then Reports.
From the submenu, select Report Designer. The Report Designer window is displayed.
The Explorer pane displays all the system-defined and in-house reports, within folders.
- From the Explorer pane, select the folder in which your report is located. The entry is highlighted and the reports that are within this folder are displayed in the Contents pane.
- From the Contents pane, right click on the report you want to delete and from the pop-up menu, select Delete .
- Confirm the deletion to remove the report.
Exporting a Report
You can export a report design to a Report file (in the RTM format) on your computer. You may want to do this so that you can load it onto another vFire Core system as necessary (for example, you want to transfer a report from a test system to the production system).
-
Select Menu and then Reports.
From the submenu, select Report Designer. The Report Designer window is displayed.
The Explorer pane displays all the system-defined and in-house reports, within folders.
- From the Explorer pane, select the folder in which your report is located. The entry is highlighted and the reports that are within this folder are displayed in the Contents pane.
- From the Contents pane, right click on the report you want to export and from the pop-up menu, select Save to File .
- Navigate to the folder in which to save the report, and specify a file name unless you want to accept the default.
-
If you are transferring a report file between vFire Core servers and the report uses custom data views, you will also have to create these on the target server in order for the report to generate correctly.
- Select Save.
Creating a Folder
Any modifications made within the Report Designer will be organization wide.
Before you start
You must have the relevant report selected in your Reporting security role.
-
Select Menu and then Reports.
From the submenu, select Report Designer. The Report Designer window is displayed.
The Explorer pane displays all the system-defined and in-house reports, within folders.
- From the Explorer pane, select the folder for which you want your sub-folder to be created. Select All Folders if you want to create a folder below the root folder. The Contents pane displays all the reports within the selected folder.
- Right click on the window and from the pop-up menu, select New Folder
 . A sub-folder is created.
 - Type a name for your new folder and press Enter. The folder is created and saved.
If an Analyst’s Reporting security role has Security selected, they must have the new folder added to their security role to view it in the Report Designer.
Renaming a Folder
Any modifications made within the Report Designer will be organization wide.
-
Select Menu and then Reports.
From the submenu, select Report Designer. The Report Designer window is displayed.
The Explorer pane displays all the system-defined and in-house reports, within folders.
- From the Explorer pane, right click on the folder you want to rename.
- From the pop-up menu, select Rename. The selected folder’s name is in edit mode. Type the name you want to assign to the selected folder and press Enter. The folder’s name is updated.
Deleting a Folder
You should be aware that any modifications made within the Report Designer will be organization wide.
You cannot reverse this procedure.
-
Select Menu and then Reports.
From the submenu, select Report Designer. The Report Designer window is displayed.
The Explorer pane displays all the system-defined and in-house reports, within folders.
- From the Explorer pane, select the folder you want to delete. Right click on the entry.
- From the pop-up menu, select Delete . Confirm the deletion. The selected folder is deleted. The selected folder along with all the folders and reports within it are deleted.